DRIVE LINE SAFETY TIPS
Agriculture and forestry are recognized as one of the most hazardous occupations. Today's farmer spends long hours in close proximity to increasingly and powerful machinery.
To avoid accidents, everyone from the component supplier and the company who manufacturers and assembles the machinery, to the dealers and ultimately the actual user, must keep safety in mind. The checklist below relates to the drive line of agricultural implements, general safety literature, and the standards published by the American Society of Agricultural Engineers.
DRIVE LINE SAFETY CHECKLIST
Drive-Line Specifications - The first step towards safe applications is to specify and test the drive-line so that it operates properly under expected field conditions.
- Specify and test the proper size joints and telescoping members based upon the power required by the implement, speed of rotation, joints, angles, shock loads, and expected life.
- Test the hitch geometry to prevent the drive line from:
- Extending beyond the recommended maximum length.
- Bottoming out.
- Reach a position that allows universal joints to lock.
- Exceeding the maximum allowable angle for constant velocity of the universal joints
Information concerning these par maters may be found in all drive-line manufacturer's catalogs.
3. Specify and test telescoping members to allow the lowest possible thrust loads, considering the expected working conditions.
4. Specify and test torque limiters to control excessive shock loads.
5. Where necessary, specify and test overrunning clutches to prevent inertial loads from overpowering the tractor.
DRIVE LINE SAFETY CHECKLIST
Hazard Reduction - The second step in specifying a safe drive-line application is to strive to eliminate as many hazards as possible.
- On drive-line with torque limiting or overrunning devices, specify that the device be positioned to the end of the drive-line by the implement.
- For implement connections which require bolts or set screws, select and/or supply hardware which minimizes protrusions. Information concerning these parameters may be found in all drive-line manufacturer's catalogs.
- For tractors PTO Shaft connections, specify a safety type yoke (twist or slide collar to minimize protrusions.
- Provide a proper clearance zone for the operation of the drive-line, to avoid damaging the shielding components.
Some common areas of interference are:
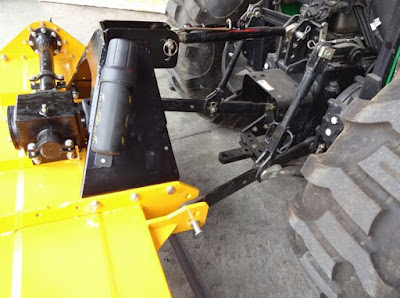
- Three point linkage.
- Extended or eye loop hitch pins.
- Hydraulic hoses.
Guarding - For hazards which cannot be eliminated effectively, guarding must be provided whenever feasible.
The PTO master shield, integral drive-line shield, and implement input connection shield should provide an interactive guarding system.
- Provide instructions by labels or manuals. The implement should be used only with the tractor's PTO master shield in place.
- Specify and test an integral drive-line shield with end cones which overlap, but not interfere with the PTO master shield or implement input connection shield.
- Provide an implement input connection shield to interact with the integral drive-line shield to provide guarding of the shaft coupling and any torque limiting devices installed on the drive line.
- Check that all routine maintenance of the drive-line can be done without removal on the shields.
Warnings and Instructions - Provide warnings and instructions for hazards associated with the machine. Provide instructions for proper maintenance and repair.
- Provide labels on the unit to advise the user of proper hitch dimensions and maximum safe operating speed.
- Check that proper danger labels are supplied with the drive-line concerning these par maters amy be found in all drive-line manufacturer's catalogs.
- Provide easy-to-understand instructions for proper drive-line concerning these parameters may be found in all drive-line manufacturer's catalogs.
- Advise against the use of PTO adapters which may defeat the purpose of the tractor's master shield and adversely affect the performance of the drive-line.
- Advise the user of locations of genuine original equipment spare parts.
Further information about drive-line specifications and safety may be obtained from your drive-line supplier and the following ASME standards and engineering practices:
S203 - Rear power take-off for agricultural tractors
S205 - Power take-off definitions and terminology for agricultural tractor
S207 - Operating requirements for tractors and power take-off driven equipment implements
S318 - Safety for agricultural equipment
S331 - Implement power take-off drive-line specifications
S333 - Agricultural tractor auxiliary power take-off drives
S350 - Safety alert symbol for agricultural equipment
S441 - Safety signs
S493 - Guarding for agricultural equipment
EP363 - Technical publications for agricultural equipment
Other standards may apply for particular types of implements. All drive-line manufacturers strive to produce a safe product. Drive-lines, like most other components must be used properly, including the use of proper tractor master shields and implement input connection shields. Please contact us if you have any questions about your drive-line applications.
Official Website: http://www.woodmaxx.com
Facebook Page: http://www.facebook.com/woodmaxx
Twitter Feed: http://www.twitter.com/woodmaxxltd
Tumblr Page: http://woodmaxxltd.tumblr.com/
Blog Spot: http://woodmaxxltd.blogspot.com/
WordPress Site: https://ptowoodchipperblog.wordpress.com/
LinkedIn Profile: https://www.linkedin.com/pub/woodmaxx-power-equipment-ltd/51/800/469
Phone # 1-855-966-3629
Email: woodmaxxltd@gmail.com
Address: 42 Jackson Street, Akron, NY, 14001
Hours of Operation: Monday through Friday 8am to 5pm Eastern Time
#RotaryTiller #PTOrotorayTiller #80inchRotaryTiller #80inchPTOrotaryTiller #CommercailRotaryTiller #CommercailPTOrotaryTiller #80inchCommercailPTOrotraryTILLER
#80InchRotaryTillerForSale #TractorRotaryTillerAttachment #80InchTractorRotaryTillerAttachment #RotaryTillerForSale #80inchPTORotaryTillerFORsale #RotaryTillerForTractors #IndustrialRotaryTiller #80inchIndustrialRotaryTiller #PTOdrivenRotaryTiller #80inchPTOdrivenRotaryTiller #80inchINDUSTRIALrotaryTILLERforSALE #TractorRotaryTiller
#TractorMountedRotaryTiller #TractorRotaryTillerForSale


